Wednesday, May 20, 2009

Spicy Carrot Pickles

For many of us, food is the vehicle through which we experience life. We plan vacations around the restaurants we would like to visit. I think that the best way to experience the culture of an area is through the local food. For many who visit San Francisco, Tartine Bakery is one of those destinations.

They produce the best bread that I have ever had. It is a levain style with a moist chewy interior and crispy crust. I think it rivals the baguettes in France for my favorite bread ever. Tartine is located in a rather hip neighborhood and right next door to another destination restaurant, Delfina. It's also within a block or two of Bi-Right Creamery. I live in Oakland which is really just a short train ride into the city, but surprisingly I have only been to Tartine twice.

The first time I went I ordered one of their pressed sandwiches. It wasn't particularly memorable, but what I do remember are the pickled carrots that were served with it. Sweet, spicy, crunchy. I wished that I could just have a big plate of those. So when I saw a recipe for pickled carrots in Molly's book, I didn't hesitate, not even for a minute. Fortunately, I had just gotten some baby carrots at the farmer's market, and their fate was sealed.
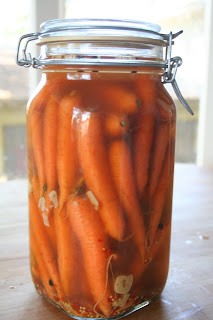
Spicy Pickled Carrots with Garlic and Thyme
adapted from A Homemade Life by Molly Wizenberg
I have been tasting a carrot (or two) each day, and the strength of the brine is mellowing more each day. The next time I make these I will probably double the amount of red pepper flakes below. So if you like spicy, I would suggest starting out with 2 teaspoons of red pepper flakes.

2 cups apple cider vinegar
2 cups water
1/4 cup granulated sugar
6 sprigs fresh thyme
5 large garlic cloves, thinly sliced
1 1/2 teaspoons black peppercorns, cracked
1 1/2 teaspoons red pepper flakes
Heaping 1 1/2 teaspoons salt
Heaping 2 teaspoons brown mustard seeds
1 1/2 pounds small (finger-sized) carrots, or standard carrots cut into sticks about 1/2 inch wide and 3 inches long

In a medium saucepan, combine 1 1/2 cups apple cider vinegar, water, sugar, thyme, garlic, black peppercorns, red pepper flakes, salt and mustard seeds. Bring to a boil over medium high heat, then reduce to a simmer and cook, stirring occasionally, for 10 minutes. Remove the pan from the heat, and let cool for 5 minutes. Stir in the remaining 1/2 cup vinegar.

Wash the carrots and put them in a large, heatproof bowl, and pour the warm brine over them. Cool to room temperature.

While the carrots cool, wash 2 quart sized canning jars and their lids in warm, soapy water.

When the carrots and brine are cool, distribute the carrots evenly among the jars, arranging them snugly. Divide the brine evenly among the jars. The carrots should be covered completely by the brine. If they are not, add a mixture of 2 parts vinegar and 1 part water to cover.

Seal firmly and refrigerate for at least 3 days, or, preferably, a week. Carrots are dense and take time to absorb the brine.

Note: Covered and refrigerated, the pickled carrots should last a month or two.

Sunday, May 17, 2009

Cacao Nib Ice Cream with Cherries

Every year we get a few days where temperatures reach triple digits or at least well into the 90's. I am not a fan of hot weather. But the heat propelled me to make an ice cream that I was interested in tasting but skeptical of making. I really like my ice cream to be dense and ultra creamy. The term "icy" when referring to ice cream is something I've always tried to avoid.

However, the thought of making an ice cream with a custard base did not sound remotely appetizing. The extra work of tempering and heating the egg/cream mixture along with the richness that the eggs impart to the ice cream just seemed too heavy for such a hot day. So I set out to make this ice cream from Alice Medrich. Oh Alice, I never should have doubted you! She was correct in describing this ice cream as somewhat "icy". But not in a bad way, in a completely satisfying way. It is icy and creamy at the same time.

The cream mixture is simmered and left to infuse with cacao nibs. Cacao nibs are the roasted, shelled cacao beans broken into bite-sized pieces. They are the raw material from which all chocolate is made. Nibs have a nutty flavor and are very crunchy. They are the essence of pure chocolate. I use them often in baking, so the notion of infusing their flavor into cream intrigued me.

The flavor is beguiling. I'm not sure that you would be able to say what it was if you didn't know. It definitely tastes like chocolate, but a whisper of chocolate. It is delicate and totally delicious.

Cocoa Nib Ice Cream
adapted from Pure Dessert

1 1/2 cups heavy cream
1 1/2 cups whole milk
1/3 cup cocoa nibs
1/2 cup sugar
1/8 teaspoon salt

Bring the cream, milk, nibs, sugar and salt to a simmer in a medium saucepan over medium heat. Remove from the heat, cover, and let steep for 20 minutes.

Pour the cram mixture through a fine strainer, pressing on the nibs to extract their liquid, discard the nibs. Refrigerate at least 4 but preferably 12 hours. Freeze the mixture according to the instructions on your ice cream maker.

makes 3 1/2 cups.


I bought some cherries at the farmer's market, and they were the perfect complement to the cacao nib ice cream. I just pitted them, tossed them with some sugar and brandy, and let them macerate for a couple of hours. The cherries became slightly softened and juicy, but retained their fresh character.

Fresh Cherry Compote

1 pound of cherries
2-4 tablespoons sugar (depending on sweetness of cherries)
1/2 tablespoon kirsch or brandy

Remove the pits from the cherries. Toss the cherries in a bowl with the sugar and brandy. Let the cherries macerate for at least an hour. They will release their juices and soften a bit.

Sunday, May 10, 2009

Grilled Fava Beans: For a Lazy Day

Yesterday was the most perfect Mother's Day that I've experienced since becoming a mother. The weather was perfect, and I wanted to spend the whole day outside enjoying our new backyard. Louis has spent the last 3 months landscaping and constructing 6 raised beds. And with the new swing, I just want to sit back there and watch the plants grow.


We went to the farmer's market in the morning. My mind was definitely on grilling. One, because it was perfect outside and two, because Louis does all of the work when we grill. And yesterday, I just wanted to be lazy. I spent most of the day laying on the swing reading and watching Louis tend to the garden, planting out some new things we picked up at the market, some zephyr squash and strawberries.


When it came time to eat, I just tossed some fava beans with olive oil, salt and pepper and handed them to Louis. I must say, I was a bit skeptical of grilled fava beans. I had read about the chef at A16 in San Francisco doing it, so I thought it was time to give it a try.

I often don't buy fava beans because they are so much work to prepare. First you need to take them out of the pod. Then there is a skin covering each bean which needs to be removed. So just throwing them on the grill without any prep was exactly what I was in the mood for yesterday. And guess what. They were amazing! The pods get a bit charred and become really easy to open. The beans get steamed while the pods char. When you open the pods and slip the beans out, the little charred bits along with the salt and oil get on your fingers and flavor the beans as you pop them in your mouth. Served with some salty sheep's milk cheese and radishes, it was a perfectly lazy meal for a perfectly lazy day.


Grilled Fava Beans

1 pound whole fava beans
2 tablespoons extra virgin olive oil
Salt
Chopped mint and chili flakes (optional)

Prepare a grill with medium hot coals

Toss the fava beans with the olive oil and salt to taste. Grill the beans, turning a few times for 6-8 minutes, until the beans are charred in spots but not completely blackened.

Pile the beans onto a platter and let cool for a few minutes. Top with chopped mint and chili flakes if you want.

To eat, pry open pods, pop out beans, pinch off tip of wrinkled skin with you fingernail and squeeze out tender, fragrant fava. Lick your oily, salty fingertips...

Serve with radishes, sheep's milk cheese and some white wine.

Serves 2-3

Thursday, May 7, 2009

Morels: A Spring Indulgence

I walked past the mushroom vendor at the farmer's market last week, and I stopped dead in my tracks. It had been about a year since I last bought morels. Their season is short and at 15$-30$ per pound, I usually buy them just once a season.

We had been out of town for a week, so I was at the farmer's market stocking up. I think I was feeling a little deprived after a week of no cooking, so I didn't even think twice about snatching up some of these beauties. I even decided on 2 bags. If I was going to indulge, I figured I should just go for it.

Morels are spongy creatures with lots of nooks and crannies to soak up juices. They would be great in a sauce to spoon over veal chops or in a bright spring vegetable ragout. But I figured that this would be my one morel buying experience of the year, and I don't think there is a better way to indulge in morel extravagance than to have them roasted and bathed in a creamy sauce.

The morels are first roasted in a hot oven with some garlic and thyme until they are tender and have given off their juices. Then a mixture of shallot, lemon and creme fraiche is added and roasted a bit longer. The brightness from the lemon and creme fraiche is the perfect match for the earthy morels.

We ate these with some crusty bread to sop up the juices while swaying on our new backyard swing. It's good to be home.

Roasted Morels
adapted from The Chez Panisse Cafe Cookbook

1 shallot, peeled and finely diced
1 tablespoon unsalted butter
1/2 tablespoon Cognac or Brandy
1/2 tablespoon Champagne vinegar
Juice of 1/4 of a lemon
Salt and Pepper
2 tablespoons creme fraiche
1/2 pound fresh morel mushrooms
1/2 tablespoon extra virgin olive oil
1 teaspoon finely chopped thyme
2 garlic cloves sliced

Preheat the oven to 400F

Saute the shallot in butter over medium heat until nicely browned. Add the Cognac and reduce for 30 seconds. Remove the pan from the heat and add the Champagne vinegar and lemon juice. Season with salt and pepper. Stir in the creme fraiche and set aside.

Pick over the mushrooms, discarding any that are moldy and trimming the ends and any discolored spots. Slice lengthwise into strips about 1/4 inch wide. Rinse the morels well by covering them with water and swishing around. Let the grit settle for a few seconds then scoop the mushrooms out into a strainer leaving the grit in the bottom of the bowl. Repeat if necessary. Toss the morels in a bowl with the olive oil, thyme, garlic and salt and pepper. Transfer to a baking dish large enough to hold the mushrooms in one layer.

Roast the morels uncovered until they are tender, about 20 minutes, stirring a few times during cooking. By the end of the cooking, there will be lovely juices to incorporate into the sauce. Add the shallot mixture to the mushrooms, stir well, and continue cooking for 3-4 minutes. Taste the sauce and adjust the seasoning.

Serve the morels with some crusty bread, spooned over some grilled bread or along side some roasted meat.

Serves 2

Friday, May 1, 2009

Braised Baby Artichokes

Artichokes are definitely at the top of my list of favorite vegetables. If I see them listed on the menu at a restaurant, I inevitably order that dish.

There is an artichoke dip from Costco that I love. It's creamy and spicy and full of chunky artichokes. But I have a problem. I can't bring myself to buy pre-made or pre-prepped dishes. This causes me to miss out on artichoke deliciousness quite often because sometimes (a lot of the time) I'm too lazy to go through all of the prep of making an artichoke completely edible.

A colleague used to laugh at me because I would ask her to bring the Costco artichoke dip to our potlucks. I'm totally fine with and will happily eat whatever anyone else makes or brings, but I could not use canned or frozen artichokes, or even worse, buy a pre-made dish. Hence my conundrum...

Actually, prepping artichokes isn't all that bad. And if you use baby artichokes, there isn't even a choke to clean out! Baby artichokes refer to the size of the artichokes not the age. The babies grow at the bottom of the artichoke plant and never fully develop.

First, cut off the top half of the artichoke. Then peel back all of the dark green leaves until you get to the pale yellow leaves. Try to leave the meaty bottom of the leaves attached to the artichoke. Next, use a vegetable peeler to peel the stem and all of the green areas off of the artichoke. Cut the chokes in half and place in a bowl of water with the juice of 1 lemon.

Once the prep is done, this dish is a cinch to make. Saute some chopped garlic and a few thyme sprigs briefly in some olive oil. Add the artichokes with a some of their lemon water and simmer until al dente. Then the artichokes are removed and the juices are concentrated and poured back over the artichokes. You end up with a richly flavored lemony broth.

I served these as a side to a roasted chicken and creamy polenta. But they were just as good, if not better, eaten straight from the bowl with my fingers while the bird was cooking.

Braised Baby Artichokes
adapted from Vegetarian Cooking for Everyone

24 baby artichokes trimmed
Juice of 1 large lemon
1/4 cup extra virgin olive oil
6 thyme sprigs
2 strips lemon zest
2 garlic cloves slivered
1 bay leaf
1 tablespoon chopped thyme or parsley
Salt and Pepper

Drop the finished artichokes into a bowl with the lemon juice and water to cover.

Warm half of the oil with the lemon zest in a medium sate pan with a tight fitting lid. Add the artichokes with 2 1/2 cups of the lemon water, 1/2 teaspoon last, garlic an d bay leaf. Bring to a boil, then lower the heat, cover and simmer until the artichokes are tend, 15-20 minutes. Scoop them into a bowl, then reduce the remaining liquid until about 1/2 cup remains. Pour it over the artichoke and drizzle the remaining oil over the top. Garnish with a little pepper and the chopped herb.

Serves 4

Saturday, April 11, 2009

Elixir of Fresh Peas and Radish Butter Sandwiches

Spring at the farmer's market is in full swing. The stalls were overflowing with strawberries, baby lettuce, asparagus, spring onions, green garlic, fava beans, radishes and english peas. The season for english peas is so short, so I couldn't pass them up. Aside from being delicious, they also provide great entertainment for a 3 year old who always insists on helping.

Don't get me wrong. I love that Ella is interested in food and cooking. It's just that most of the time her helping involves much more mess or adding ingredients to the wrong dishes. A while back I was multitasking, making a pasta sauce for dinner and some lemon curd for a dessert. The pasta sauce was cooking, and I had my measuring cup full of lemon juice for the curd. I turned around to grab a spoon out of a drawer and I heard Ella say "Look, I did it!" She had poured the whole measuring cup full of lemon juice into the pasta sauce! She was standing there proudly holding the empty measuring cup with a big smile on her face. Oh, the adventures of cooking with a toddler...

So in addition to the peas, I also bought some beautiful spring onions. They are rather elegant looking, dare I say sexy. And the radishes were beautiful shades of pastel, irresistible. I've recently fallen in love with radishes, smearing them with butter and sprinkling with sea salt. But the idea of a radish butter to smear on bread sounded like the perfect accompaniment for a simple pea soup.


Elixir of Fresh Peas
(adapted from Local Flavors by Deborah Madison)

I love the name of this soup. It conjures up the image of an alchemist stirring unknown ingredients in a cauldron to produce a prized liquid. And I would say that this soup could be considered just that. It is like Spring in a spoonful. It takes a bit of time to shell the peas, but once that is done, the soup comes together quickly. It tastes like the essence of fresh peas. The addition of a little truffle oil at the end adds an earthy complexity that compliments the sweetness of the peas beautifully.

1 bunch scallions or 2 small leeks, thinly sliced
5 large parsley stems with leaves
sea salt and freshly ground pepper
1 1/2 pounds english peas
1 teaspoon unsalted butter
1/2 cup thinly sliced spring onion or young leek
1/2 teaspoon sugar
truffle oil

To make the stock, bring 1 quart water to a boil. As it's heating, add the scallions, parsley, and 1/2 teaspoon salt. Add about 3 cups of pea pods as you shell them. Once the water comes to a boil, lower the heat. Simmer for 20 minutes, then strain.

Melt the butter in a soup pot and add the sliced onion. Cook over medium heat for about a minute, then add 1/2 cup of the stock so that the onion stews without browning. After 4-5 minutes, add the peas, 1/2 teaspoon salt, and the sugar. Pour in 2 1/2 cups of the stock, bring to a boil, and simmer for 3 minutes, or until the peas are soft and cooked through, larger peas may take a bit longer.

Transfer the soup to a blender. Drape a towel over the lid and give a few short pulses to make sure it won't splatter. Then puree at high speed for 1 minute. Pour into soup bowls and serve immediately, adding a few drops of the truffle oil to each bowl.

4-6 servings.

Radish Butter for Radish Sandwiches
(adapted from Local Flavors by Deborah Madison)

6 small to medium radishes
4 tablespoons unsalted butter at room temperature
1 teaspoon finely grated lemon zest
sea salt

Wash and trim the radishes and chop in half or quarters. If the leaves are tender and fresh, set a dozen or so aside, stems removed. Chop the leaves. There should be about 1/2 cup.

Add the butter, radishes, lemon zest and a pinch of sea salt to a mini food processor and process until the radishes are finely chopped and a sort of paste has formed. Stir in the radish leaves. Spread on slices of crusty baguette and serve.

makes 1/2 cup

Monday, April 6, 2009

Rhubarb And Strawberry Compote: Oh The Possibilities

I was in my twenties before I ever tasted rhubarb. My family never made anything with it. In fact, I distinctly remember my mother saying that she didn't like it. It was stringy. It's funny how your parent's food prejudices transfer to you. And by funny, I mean how sad and what a waste of twenty some odd years without rhubarb.


I have spent the past 10 springs eagerly awaiting rhubarb's arrival at the market. I bought my first rhubarb of this season last week. We were making dinner with the family of one of Louis' students, and I wanted to make a pavlova with a rhubarb and strawberry compote. It was delicious. There is something so luxurious about pavlova. Meringues are partially baked until the outer shell is crisp, but the interior remains marshmallowy. Pavlova are often topped with whipped cream and berries or berry sauce. There is a good tutorial on making pavlova here. The tartness of the rhubarb complements the sweet meringue and cream beautifully.

There was plenty of compote leftover, so I also used it to make a rhubarb and strawberry shortcake. I made some cornmeal scones, sliced in half, slathered on some whipped cream and rhubarb and strawberry compote. Et voila, rhubarb and strawberry shortcake.

The compote is so easy and really versatile. I've used it for pavlova, shortcake and layered it with coconut rice pudding for a supper comforting parfait. The possibilities are utterly endless, as long as something creamy is involved. OK, now I'm reminded why the last 10 pounds of baby weight still hasn't come off! Although, can it really be considered baby weight after 3 years...


Rhubarb and Strawberry Compote
Half of the rhubarb and the strawberries are added near the end of cooking so that they remain whole and give the compote a bit of texture. The rhubarb should be soft but not falling apart.

1 1/2 pounds rhubarb, cut into 1 inch lengths
1 cup sugar
1 pint of strawberries quartered
1/2 vanilla bean

Put half of the rhubarb into a medium sized saucepan with the sugar. Slice the vanilla bean open and scrape the seeds into the pan with the rhubarb and sugar, and add the vanilla pod. Add a couple of tablespoons of water to the pan and bring to a boil over medium heat. Cover the pan and cook the rhubarb for 10-15 minutes, stirring occasionally to prevent scorching. The rhubarb should be completely soft and starting to break down. Add the rest of the rhubarb to the pan, cover and cook another 3-5 minutes. Add the strawberries and cook uncovered for 2 more minutes. Transfer the compote to a bowl and cool. Store covered in the refrigerator for 3-5 days.

makes about 2 1/2 cups (enough for a couple of different uses)

Coconut Rice Pudding

The coconut flavor in this pudding comes from coconut milk. Make sure that you are using the unsweetened stuff often used in Thai cooking. The pudding is delicious served hot or cold. I let mine sit in the refrigerator overnight and folded some whipped cream into it just before serving to give it an airy texture.


2 14 ounce cans light unsweetened coconut milk
1 14 ounce can regular unsweetened coconut milk
2/3 cup sugar
2/3 cup arborio rice
3/4 teaspoon kosher salt
1/2 vanilla bean split lengthwise or 2 teaspoons vanilla extract

Combine all coconut milk, sugar ,rice and 3/4 teaspoon salt in heavy large saucepan. If using vanilla bean, scrape in seeds from bean and add bean to saucepan. Bring mixture to a simmer over medium heat, stirring occasionally. Adjust heat so that mixture is barely simmering. Cover partially and cook until the pudding is thickened to the consistency of loose oatmeal, stirring and scraping the bottom and sides of the pan frequently, 30-45 minutes. Remove the vanilla bean, if using, or stir in vanilla extract.

Serve warm or cold.

makes 10 servings of about 3/4 cup .