Thursday, May 7, 2009

Morels: A Spring Indulgence

I walked past the mushroom vendor at the farmer's market last week, and I stopped dead in my tracks. It had been about a year since I last bought morels. Their season is short and at 15$-30$ per pound, I usually buy them just once a season.

We had been out of town for a week, so I was at the farmer's market stocking up. I think I was feeling a little deprived after a week of no cooking, so I didn't even think twice about snatching up some of these beauties. I even decided on 2 bags. If I was going to indulge, I figured I should just go for it.

Morels are spongy creatures with lots of nooks and crannies to soak up juices. They would be great in a sauce to spoon over veal chops or in a bright spring vegetable ragout. But I figured that this would be my one morel buying experience of the year, and I don't think there is a better way to indulge in morel extravagance than to have them roasted and bathed in a creamy sauce.

The morels are first roasted in a hot oven with some garlic and thyme until they are tender and have given off their juices. Then a mixture of shallot, lemon and creme fraiche is added and roasted a bit longer. The brightness from the lemon and creme fraiche is the perfect match for the earthy morels.

We ate these with some crusty bread to sop up the juices while swaying on our new backyard swing. It's good to be home.

Roasted Morels
adapted from The Chez Panisse Cafe Cookbook

1 shallot, peeled and finely diced
1 tablespoon unsalted butter
1/2 tablespoon Cognac or Brandy
1/2 tablespoon Champagne vinegar
Juice of 1/4 of a lemon
Salt and Pepper
2 tablespoons creme fraiche
1/2 pound fresh morel mushrooms
1/2 tablespoon extra virgin olive oil
1 teaspoon finely chopped thyme
2 garlic cloves sliced

Preheat the oven to 400F

Saute the shallot in butter over medium heat until nicely browned. Add the Cognac and reduce for 30 seconds. Remove the pan from the heat and add the Champagne vinegar and lemon juice. Season with salt and pepper. Stir in the creme fraiche and set aside.

Pick over the mushrooms, discarding any that are moldy and trimming the ends and any discolored spots. Slice lengthwise into strips about 1/4 inch wide. Rinse the morels well by covering them with water and swishing around. Let the grit settle for a few seconds then scoop the mushrooms out into a strainer leaving the grit in the bottom of the bowl. Repeat if necessary. Toss the morels in a bowl with the olive oil, thyme, garlic and salt and pepper. Transfer to a baking dish large enough to hold the mushrooms in one layer.

Roast the morels uncovered until they are tender, about 20 minutes, stirring a few times during cooking. By the end of the cooking, there will be lovely juices to incorporate into the sauce. Add the shallot mixture to the mushrooms, stir well, and continue cooking for 3-4 minutes. Taste the sauce and adjust the seasoning.

Serve the morels with some crusty bread, spooned over some grilled bread or along side some roasted meat.

Serves 2

Friday, May 1, 2009

Braised Baby Artichokes

Artichokes are definitely at the top of my list of favorite vegetables. If I see them listed on the menu at a restaurant, I inevitably order that dish.

There is an artichoke dip from Costco that I love. It's creamy and spicy and full of chunky artichokes. But I have a problem. I can't bring myself to buy pre-made or pre-prepped dishes. This causes me to miss out on artichoke deliciousness quite often because sometimes (a lot of the time) I'm too lazy to go through all of the prep of making an artichoke completely edible.

A colleague used to laugh at me because I would ask her to bring the Costco artichoke dip to our potlucks. I'm totally fine with and will happily eat whatever anyone else makes or brings, but I could not use canned or frozen artichokes, or even worse, buy a pre-made dish. Hence my conundrum...

Actually, prepping artichokes isn't all that bad. And if you use baby artichokes, there isn't even a choke to clean out! Baby artichokes refer to the size of the artichokes not the age. The babies grow at the bottom of the artichoke plant and never fully develop.

First, cut off the top half of the artichoke. Then peel back all of the dark green leaves until you get to the pale yellow leaves. Try to leave the meaty bottom of the leaves attached to the artichoke. Next, use a vegetable peeler to peel the stem and all of the green areas off of the artichoke. Cut the chokes in half and place in a bowl of water with the juice of 1 lemon.

Once the prep is done, this dish is a cinch to make. Saute some chopped garlic and a few thyme sprigs briefly in some olive oil. Add the artichokes with a some of their lemon water and simmer until al dente. Then the artichokes are removed and the juices are concentrated and poured back over the artichokes. You end up with a richly flavored lemony broth.

I served these as a side to a roasted chicken and creamy polenta. But they were just as good, if not better, eaten straight from the bowl with my fingers while the bird was cooking.

Braised Baby Artichokes
adapted from Vegetarian Cooking for Everyone

24 baby artichokes trimmed
Juice of 1 large lemon
1/4 cup extra virgin olive oil
6 thyme sprigs
2 strips lemon zest
2 garlic cloves slivered
1 bay leaf
1 tablespoon chopped thyme or parsley
Salt and Pepper

Drop the finished artichokes into a bowl with the lemon juice and water to cover.

Warm half of the oil with the lemon zest in a medium sate pan with a tight fitting lid. Add the artichokes with 2 1/2 cups of the lemon water, 1/2 teaspoon last, garlic an d bay leaf. Bring to a boil, then lower the heat, cover and simmer until the artichokes are tend, 15-20 minutes. Scoop them into a bowl, then reduce the remaining liquid until about 1/2 cup remains. Pour it over the artichoke and drizzle the remaining oil over the top. Garnish with a little pepper and the chopped herb.

Serves 4

Saturday, April 11, 2009

Elixir of Fresh Peas and Radish Butter Sandwiches

Spring at the farmer's market is in full swing. The stalls were overflowing with strawberries, baby lettuce, asparagus, spring onions, green garlic, fava beans, radishes and english peas. The season for english peas is so short, so I couldn't pass them up. Aside from being delicious, they also provide great entertainment for a 3 year old who always insists on helping.

Don't get me wrong. I love that Ella is interested in food and cooking. It's just that most of the time her helping involves much more mess or adding ingredients to the wrong dishes. A while back I was multitasking, making a pasta sauce for dinner and some lemon curd for a dessert. The pasta sauce was cooking, and I had my measuring cup full of lemon juice for the curd. I turned around to grab a spoon out of a drawer and I heard Ella say "Look, I did it!" She had poured the whole measuring cup full of lemon juice into the pasta sauce! She was standing there proudly holding the empty measuring cup with a big smile on her face. Oh, the adventures of cooking with a toddler...

So in addition to the peas, I also bought some beautiful spring onions. They are rather elegant looking, dare I say sexy. And the radishes were beautiful shades of pastel, irresistible. I've recently fallen in love with radishes, smearing them with butter and sprinkling with sea salt. But the idea of a radish butter to smear on bread sounded like the perfect accompaniment for a simple pea soup.


Elixir of Fresh Peas
(adapted from Local Flavors by Deborah Madison)

I love the name of this soup. It conjures up the image of an alchemist stirring unknown ingredients in a cauldron to produce a prized liquid. And I would say that this soup could be considered just that. It is like Spring in a spoonful. It takes a bit of time to shell the peas, but once that is done, the soup comes together quickly. It tastes like the essence of fresh peas. The addition of a little truffle oil at the end adds an earthy complexity that compliments the sweetness of the peas beautifully.

1 bunch scallions or 2 small leeks, thinly sliced
5 large parsley stems with leaves
sea salt and freshly ground pepper
1 1/2 pounds english peas
1 teaspoon unsalted butter
1/2 cup thinly sliced spring onion or young leek
1/2 teaspoon sugar
truffle oil

To make the stock, bring 1 quart water to a boil. As it's heating, add the scallions, parsley, and 1/2 teaspoon salt. Add about 3 cups of pea pods as you shell them. Once the water comes to a boil, lower the heat. Simmer for 20 minutes, then strain.

Melt the butter in a soup pot and add the sliced onion. Cook over medium heat for about a minute, then add 1/2 cup of the stock so that the onion stews without browning. After 4-5 minutes, add the peas, 1/2 teaspoon salt, and the sugar. Pour in 2 1/2 cups of the stock, bring to a boil, and simmer for 3 minutes, or until the peas are soft and cooked through, larger peas may take a bit longer.

Transfer the soup to a blender. Drape a towel over the lid and give a few short pulses to make sure it won't splatter. Then puree at high speed for 1 minute. Pour into soup bowls and serve immediately, adding a few drops of the truffle oil to each bowl.

4-6 servings.

Radish Butter for Radish Sandwiches
(adapted from Local Flavors by Deborah Madison)

6 small to medium radishes
4 tablespoons unsalted butter at room temperature
1 teaspoon finely grated lemon zest
sea salt

Wash and trim the radishes and chop in half or quarters. If the leaves are tender and fresh, set a dozen or so aside, stems removed. Chop the leaves. There should be about 1/2 cup.

Add the butter, radishes, lemon zest and a pinch of sea salt to a mini food processor and process until the radishes are finely chopped and a sort of paste has formed. Stir in the radish leaves. Spread on slices of crusty baguette and serve.

makes 1/2 cup

Monday, April 6, 2009

Rhubarb And Strawberry Compote: Oh The Possibilities

I was in my twenties before I ever tasted rhubarb. My family never made anything with it. In fact, I distinctly remember my mother saying that she didn't like it. It was stringy. It's funny how your parent's food prejudices transfer to you. And by funny, I mean how sad and what a waste of twenty some odd years without rhubarb.


I have spent the past 10 springs eagerly awaiting rhubarb's arrival at the market. I bought my first rhubarb of this season last week. We were making dinner with the family of one of Louis' students, and I wanted to make a pavlova with a rhubarb and strawberry compote. It was delicious. There is something so luxurious about pavlova. Meringues are partially baked until the outer shell is crisp, but the interior remains marshmallowy. Pavlova are often topped with whipped cream and berries or berry sauce. There is a good tutorial on making pavlova here. The tartness of the rhubarb complements the sweet meringue and cream beautifully.

There was plenty of compote leftover, so I also used it to make a rhubarb and strawberry shortcake. I made some cornmeal scones, sliced in half, slathered on some whipped cream and rhubarb and strawberry compote. Et voila, rhubarb and strawberry shortcake.

The compote is so easy and really versatile. I've used it for pavlova, shortcake and layered it with coconut rice pudding for a supper comforting parfait. The possibilities are utterly endless, as long as something creamy is involved. OK, now I'm reminded why the last 10 pounds of baby weight still hasn't come off! Although, can it really be considered baby weight after 3 years...


Rhubarb and Strawberry Compote
Half of the rhubarb and the strawberries are added near the end of cooking so that they remain whole and give the compote a bit of texture. The rhubarb should be soft but not falling apart.

1 1/2 pounds rhubarb, cut into 1 inch lengths
1 cup sugar
1 pint of strawberries quartered
1/2 vanilla bean

Put half of the rhubarb into a medium sized saucepan with the sugar. Slice the vanilla bean open and scrape the seeds into the pan with the rhubarb and sugar, and add the vanilla pod. Add a couple of tablespoons of water to the pan and bring to a boil over medium heat. Cover the pan and cook the rhubarb for 10-15 minutes, stirring occasionally to prevent scorching. The rhubarb should be completely soft and starting to break down. Add the rest of the rhubarb to the pan, cover and cook another 3-5 minutes. Add the strawberries and cook uncovered for 2 more minutes. Transfer the compote to a bowl and cool. Store covered in the refrigerator for 3-5 days.

makes about 2 1/2 cups (enough for a couple of different uses)

Coconut Rice Pudding

The coconut flavor in this pudding comes from coconut milk. Make sure that you are using the unsweetened stuff often used in Thai cooking. The pudding is delicious served hot or cold. I let mine sit in the refrigerator overnight and folded some whipped cream into it just before serving to give it an airy texture.


2 14 ounce cans light unsweetened coconut milk
1 14 ounce can regular unsweetened coconut milk
2/3 cup sugar
2/3 cup arborio rice
3/4 teaspoon kosher salt
1/2 vanilla bean split lengthwise or 2 teaspoons vanilla extract

Combine all coconut milk, sugar ,rice and 3/4 teaspoon salt in heavy large saucepan. If using vanilla bean, scrape in seeds from bean and add bean to saucepan. Bring mixture to a simmer over medium heat, stirring occasionally. Adjust heat so that mixture is barely simmering. Cover partially and cook until the pudding is thickened to the consistency of loose oatmeal, stirring and scraping the bottom and sides of the pan frequently, 30-45 minutes. Remove the vanilla bean, if using, or stir in vanilla extract.

Serve warm or cold.

makes 10 servings of about 3/4 cup .

Sunday, March 22, 2009

Green Garlic Souffle

Spring is here! I love the change of season. Well, it's not as if we really experience different seasons in the San Francisco Bay Area, but the change in the quality of the light really affects me. There is a new brightness to the quality of the light that has me very excited about green things. Not the dark green kale of winter, but the bright green of baby spring vegetables. It seems like each week there are new crops popping up at the farmer's market.

Green garlic has been around for some weeks now, and I'm sure to grab some each time I'm at the market. I try to O.D. on certain vegetables during their time so that I'm ready to move on when they are no longer available. Green garlic could easily be mistaken for leeks, but they often have a little blush of pink that gives them away. Green garlic is baby garlic that has not yet matured into individual cloves. You simply slice it as you would a leek. Actually green garlic reminds me of what a cross between garlic and leeks would be like. A delicate perfume of garlic with the sweetness of leeks.

Asparagus has finally arrived at the farmer's market as well, and I could not help grabbing a couple of bunches. If I had to pick a favorite vegetable, it just might be asparagus. It's like candy when it's grilled. A little charred and crispy on the outside with just enough snap left to keep it from being stringy. I could make a meal out of grilled asparagus, but today I wanted to treat it delicately by just bathing it in some cream brightened with a bit of meyer lemon juice.

Actually, the asparagus with meyer lemon cream was a bit of an afterthought. My original plan was centered entirely on a souffle scented with green garlic. But after tasting the souffle batter, sweet with a richness from Gruyere, I knew I needed to serve something with it to introduce a bit of brightness. A salad dressed in a lemony vinaigrette would have also worked, but I had 3 whole bunches of asparagus waiting to be used.

This souffle is actually quite easy and stress free as far as souffles go. It would be perfect to serve for a brunch or dinner party because it can be cooked ahead of time and reheated just before serving.

Green Garlic Souffle
(Adapted from The Chez Panisse Cafe Cookbook)

4 tablespoons butter
1/4 cup flour
1 1/2 cups milk, slightly warmed
Salt
2 branches thyme
1 medium onion
1/2 pound green garlic, sliced (about 1 cup)
1/2 cup grated Gruyere cheese
Pepper
3 eggs, separated

1 bunch asparagus
1 cup heavy cream
1-2 tablespoons lemon juice

Melt 3 tablespoons of the butter over medium-low heat in a heavy bottomed pan. Add the flour and cook for a few minutes, stirring to keep the flour from browning. Slowly pour in the milk, a little at a time, whisking each addition until smooth before adding more. Add 1/2 teaspoon salt and the thyme branches. Cook over very low heat for 20 minutes or so, until this bechamel sauce is medium-thick and lump free. Stir frequently to be sure it is not sticking. Cool to room temperature. Remove and discard the thyme sprigs and set the bechamel aside.

Dice the onion and cook over medium heat in the remaining tablespoon of butter. When the onion becomes translucent, after about 5 minutes, add the sliced green garlic and 1 teaspoon salt and lower the heat. Add a little water to keep the vegetables from browning. Cook until the garlic is soft and the water nearly evaporated, about 10 minutes. Add more water during the cooking if necessary.

Cool the mixture and puree in a food processor or food mill. Stir the puree into the bechamel. Add the Gruyere and some freshly ground pepper, and mix well. Taste and adjust the seasoning, the sauce should be fairly highly seasoned. Add the egg yolks, lightly beaten, and mix well again.

Preheat the oven to 400F. Generously butter six 8 ounce ramekins. Beat the egg whites until they form soft peaks and fold them into the souffle base. Fill the ramekins and place them in a deep baking dish. Pour hot water halfway up the sides of the ramekins. Bake for 20-30 minutes, until the souffles are puffed and golden brown on the top. Carefully remove the ramekins from the water bath. When the souffles have cooled a bit, unmold them by running a paring knife around the edge of each ramekin, invert the souffle into the palm of your hand, and place it in a shallow baking dish, top side up. The souffles can now be held at room temperature for a few hours.

While the souffles are cooking prepare the asparagus. Slice the asparagus on the bias. Place in a saute pan with 2/3 cup heavy cream and 1/4 teaspoon salt and simmer until the asparagus is cooked, about 5 minutes. Add some lemon juice t0 taste, about 1 tablespoon at a time. Correct for salt. Adding something acidic (vinegar, lemon juice) usually throws off the balance of salt, so it is important to taste and add a bit more salt or lemon juice to suit your taste.

When ready to serve, preheat the oven to 425F. Pour 1/3 cup of the cream over and around the souffles. Bake until the cream is hot and bubbling and the souffles are puffed up again, 6-8 minutes. Serve with the hot cream and spoon the asparagus around the souffle.

Tuesday, March 17, 2009

St. Patrick's Day: A Celebration of Guinness

I'm really not much for holidays, especially those that involve gift giving. Don't get me wrong. I love giving gifts. I just don't like when I feel forced to. Maybe it's the stubborn side of my personality. I'm sure Louis could expand on the commentary here, but we'll just leave it at that.


I do however LOVE the ritual holiday celebration around food. Thanksgiving is in fact, my favorite holiday. It is purely about creating a meal to share with family and friends. And that just about sums up the most important things in life for me.


So when St. Patrick's Day comes around, it's just another excuse to make something that I would not normally make. Boiled beef and cabbage doesn't sound particularly appetizing. But when you have a beautiful pasture raised corned beef brisket and let it simmer for hours until the meat pulls apart, it can be the start of a lovely meal.


And when you end the meal with a Guinness chocolate cake and Guinness ice cream, it is even better. This chocolate cake is very moist, almost fudgy. But the star of the evening was the Guinness ice cream. It is somewhat redolent of coffee. Keri said it reminded her of black walnut which I also noticed once she said it. It's hard to pin down the exact flavor profile, but it is delicious and the flavor deepened when tasted with the chocolate cake. Even if you don't celebrate St. Patrick's Day, this ice cream is reason enough to look forward to it each year. Guinness Ice Cream
(adapted from Sunday Suppers at Lucques)

1/2 vanilla bean
1 cup whole milk
1 cup heavy cream
2/3 cup Guinness stout
2 1/2 tablespoons molasses
3 extra large egg yolks
1/3 cup granulated sugar
1/2 teaspoon vanilla extract

Split the vanilla bean in half lengthwise. Use a paring knife to scrape the seeds and pulp into a medium saucepan. Add the vanilla pod, milk, and cream, and bring to a boil over medium heat. Turn off the heat, cover, and allow the flavors to infuse for 30 minutes.

While the cream is infusing, whisk the beer and molasses together in a small saucepan, bring to a boil, and then turn off the heat.

Whisk the egg yolks, sugar, and vanilla extract together in a bowl. Whisk a few tablespoons of the warm cream mixture into the yolks to temper them. Slowly, add another 1/4 cup or so of the warm cream, whisking continuously. At this point you can add the rest of the cream mixture in a slow, steady steam, whisking continuously. Pour the mixture back into the pot, and return to the stove.

Stir the beer mixture into the cream and cook the custard over medium heat, 6-8 minutes, stirring frequently with a rubber spatula and scraping the bottom and sides of the pan. The custard will thicken and when it's done, will coat the back of the spatula. Strain the mixture, and chill at least 2 hours in the refrigerator. When the custard is very cold, process it in an ice cream maker according to the manufacturer's instructions.

Guinness Chocolate Cake
(adapted from Feast by Nigella Lawson)
I found this recipe on various blogs and websites. There were some discrepancies between the recipes concerning the amounts of some ingredients. This is what I ended up doing. A kitchen scale is necessary here.

1 cup Guinness
10 tablespoons butter
75 grams cocoa
400 grams superfine sugar
3/4 cup sour cream
2 eggs
1 tablespoon vanilla extract
2 cups all purpose flour
2 1/2 teaspoons baking soda

Preheat oven to 350F and grease and line a 9 inch springform pan.

Pour the Guinness into a large saucepan and add the sliced butter. Heat until the butter is melted and remove from the heat. Whisk in the cocoa and sugar. In a separate bowl, whisk the sour cream with the eggs and vanilla until smooth. Add the sour cream mixture to the Guinness mixture in the saucepan and whisk to incorporate. Add the flour and baking soda to the mixture in the saucepan and whisk until smooth.

Pour the batter into the greased pan and bake for 45 minutes to 1 hour. Mine took the full 1 hour. You can check to see if the cake is done by inserting a toothpick into the center of the cake. If it comes out clean, the cake is done.

Cool completely in the pan on a wire rack.

Friday, March 13, 2009

Cookies for Molly: Ricciarelli

Wow, it's been over a month since my last post. It is really easy to get out of the habit of posting. I was sick for 2 weeks, but I think I was just really uninspired to write. I've always said that I hate writing, and it's true most of the time. I never thought that I would want to have a blog because of this. Unlike some of the most stunning blogs out there, I don't want to be a photographer or a writer. In the end, I just want to share with you some of my creations and experiences with food. I thought that some new and unexpected connections could be made through having this blog. Through the belief that shared experiences through food can bring us closer and touch us in ways that little else can.

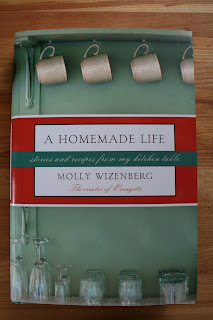
The blog that has made the biggest impact on me is Orangette written by Molly. She has such an effortless way of writing. Molly has the gift of really making you feel like you are part of her world. She makes you feel like you could just crawl through your computer screen to sit at her table. I think her prose centered around food will be remembered in history with the likes of M.F.K. Fisher and Laurie Colwin. And she has just come out with her first book! It is truly a beautiful thing to behold and so is Molly.

I went to her book signing in San Francisco last week. I had never been to a book signing before, but I was not shocked to see the place packed with people winding through the rows of shelves. I think the store owner was caught a little off guard. It is just a testament to Molly's writing and the way that she touches people. I desperately wanted to be able to sit and chat with her, but I knew she was going to be swarmed. So I made her a little care package of treats. Three types of cookies and some tea cakes. Perhaps overkill, but I wanted to cover my bases.

I would be hard pressed to describe my perfect cookie. I don't know if I could decide between a tender dark chocolate shortbread, nubbly with cocoa nibs and a lingering hint of sea salt or a dense, chewy almond macaroon. Thankfully, Molly doesn't have to choose because I made both for her.

The almond macaroons, also called ricciarelli, are incredibly easy to make. The hardest part may be finding almond paste. I buy mine in bulk from Berkeley Bowl. It comes in pliable blocks, but I've also seen it packaged in cans or tubes although I can't attest as to how those would work in this recipe. I'm sure it would be fine, so if that is all you can find, go ahead and use them. And let me know how they turn out.

Ricciarelli (Italian Almond Cookies)
(The measurements for this recipe are given in weight. If you bake on a regular basis, a kitchen scale is a worthwhile investment, especially if you use chocolate. It's also much easier to dump ingredients into a bowl to weigh out rather than carefully chopping or measuring by cups.)


In the bowl of a food processor, finely grind the following:
1 pound almond paste
1/2 pound slivered or sliced almonds
1/2 teaspoon salt
1 cup sugar
3 3/4 teaspoons baking powder

Transfer this mixture to a mixing bowl.

Add the following and mix well.
2 egg whites from extra large eggs, slightly beaten (about 70grams)
1 tablespoon vanilla extract
1/4 teaspoon almond extract

Preheat the oven to 350F. Measure out tablespoons of the dough and roll into balls. Roll the balls in powdered sugar and place on a silpat or parchment lined baking sheet. Press lightly to flatten the balls. Bake for 15-20 minutes or until cookies start to turn lightly golden brown. Remove from the oven and allow cookies to cool on the baking sheet. Store in an airtight container.


yield: 3-4 dozen

These cookies are pretty moist and I think would keep easily for a week. I haven't been able to find out because they're usually gone within 3 days in my house. I gave some to Keri and she says that they are also great straight from the freezer.